Upgrade to Win 11: 7 Powerful Steps for a Safer, Faster PC
Upgrade to Win 11 is one of the most important Windows transitions for users still working with older Microsoft operating systems. With Windows 10 support having ended on October 14, 2025, moving to a supported Windows 11 setup is increasingly important for security, compatibility, and long-term reliability.
If you are wondering whether your PC is ready, how to check compatibility, what happens to your files, or which installation method is safest, this guide walks you through the process step by step.
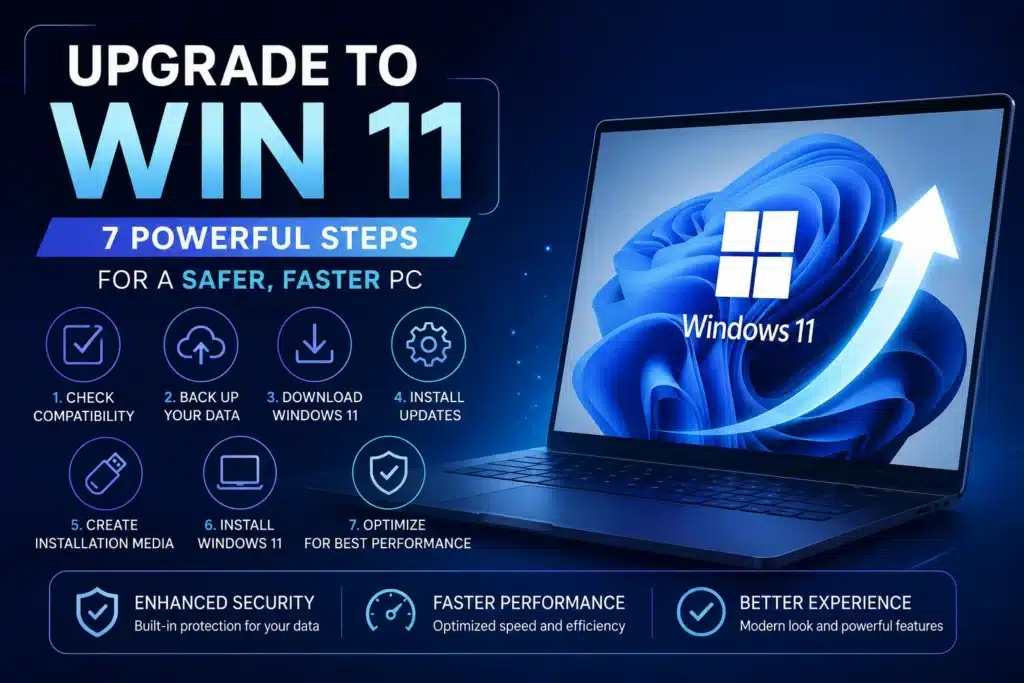
Table of Contents
- Why upgrade to Win 11?
- Windows 11 requirements
- Check compatibility before upgrading
- Prepare your PC
- How to upgrade through Windows Update
- Alternative installation methods
- What happens to your files and apps?
- Common upgrade problems
- Is your PC too old?
- Final checklist
- Frequently Asked Questions
Why upgrade to Win 11?
The biggest reason to upgrade to Win 11 is that Windows 10 support ended on October 14, 2025. Microsoft states that Windows 10 devices can continue to operate, but they no longer receive normal free security fixes and technical support through Windows Update.
Windows 11 also provides a modern desktop experience, current security features, and an operating system designed for newer hardware. For people who use their computers for school, work, browsing, productivity, or creative applications, staying on a supported operating system can reduce compatibility and security concerns.
Another reason to upgrade to Win 11 is hardware modernization. Windows 11 requires features such as TPM 2.0 and UEFI Secure Boot capability, which are designed to strengthen the security foundation of compatible computers.
If you are buying or managing Windows software, you can also review the available Microsoft software in the EshopBest Microsoft Products category.
Windows 11 Requirements
Before you upgrade to Win 11, confirm that your computer meets Microsoft’s minimum requirements.
The basic Windows 11 requirements include:
- A compatible 64-bit processor running at 1 GHz or faster with at least two cores
- At least 4 GB of RAM
- At least 64 GB of storage
- UEFI firmware with Secure Boot capability
- TPM 2.0
- A DirectX 12-compatible graphics processor with a WDDM 2.0 driver
- A high-definition display of at least 720p and 9 inches or larger
These are minimum requirements, not necessarily the ideal specifications for every workload. Some Windows 11 features and applications can require more powerful hardware.
For the authoritative technical specifications, see Microsoft’s Windows 11 requirements documentation.
Check Compatibility Before Upgrading
The easiest way to upgrade to Win 11 safely is to check eligibility before starting the installation.
Microsoft provides the PC Health Check app for this purpose. It evaluates your computer against Windows 11’s minimum hardware requirements and can explain why a device is not eligible.
Open PC Health Check and choose the option to check your Windows 11 eligibility. If your PC passes the assessment, Windows Update can normally be used as the preferred upgrade method.
You should also check Windows Update manually. Open Settings → Windows Update, and select Check for updates. If Windows 11 is ready for your computer, Microsoft may display an option to download and install it.
A compatibility result does not always mean the upgrade appears immediately. Microsoft can delay an upgrade when a known compatibility issue, driver problem, or safeguard hold could affect the installation experience.
Prepare Your PC Before You Upgrade
Before you upgrade to Win 11, take a few simple preparation steps.
1. Back Up Important Files
Create a backup of documents, photos, schoolwork, projects, and other important files. You can use cloud storage or an external backup device.
Microsoft recommends backing up your data before installing a new Windows version even though the standard upgrade process is designed to preserve personal files.
2. Install Current Windows Updates
Make sure Windows 10 is fully updated before starting. Microsoft notes that pending updates can prevent the Windows 11 upgrade from appearing in Windows Update.
Restart your computer after installing available updates, then check Windows Update again.
3. Free Some Storage Space
Windows 11 requires at least 64 GB of storage, but having additional free space is helpful for installation files, temporary files, updates, and future system maintenance.
Remove unnecessary downloads and temporary files if your drive is nearly full.
4. Check Important Applications
If you depend on professional, school, business, or creative applications, verify that they support Windows 11. Also check important printer, scanner, graphics, audio, and other hardware drivers.
Some applications may be removed during an upgrade if they are known to cause compatibility problems.
5. Keep the Computer Connected to Power
If you are using a laptop, connect the charger before starting the installation. Avoid interrupting an operating-system upgrade.
How to Upgrade Through Windows Update
For most eligible Windows 10 computers, Windows Update is the simplest way to upgrade to Win 11.
Start by opening Settings and selecting Windows Update. Choose Check for updates and install any available updates for your current Windows installation.
If Windows 11 is offered, review the information and select Download and install. The computer will restart during the process.
The installation may take longer than a normal Windows update, so allow enough time and avoid turning the computer off during the process.
After the upgrade finishes, sign in and allow Windows to complete its initial setup. Then check Windows Update again for additional updates.
You can also open Settings → System → About to confirm that Windows 11 is installed.
Alternative Installation Methods
If Windows Update does not offer Windows 11, Microsoft provides other installation options for compatible devices.
The Windows 11 Installation Assistant can help eligible PCs complete an upgrade. Microsoft also provides installation media, which can be used for certain upgrade and installation scenarios.
For a normal upgrade where you want to keep your files and applications, carefully follow the setup instructions and choose the option that preserves personal files and apps when it is available.
A clean installation is different. It can remove personal files, applications, settings, and manufacturer customizations. It should therefore be treated as a more advanced option and used only after you have a reliable backup.
For complete instructions, visit Microsoft’s official Windows 11 installation guide.
What Happens to Your Files and Apps?
One of the most common questions before you upgrade to Win 11 is whether personal data will disappear.
With the standard in-place upgrade, the default experience is designed to move your personal files and data into the new Windows 11 installation. However, Microsoft still recommends making a backup before beginning.
Some applications may need attention. If Microsoft identifies an application or driver as incompatible, the upgrade process may prevent the installation or remove certain software that is known to cause problems.
After installation, check your essential applications, printers, external devices, and security software.
It is also a good idea to verify that your important files are accessible before deleting any backup or old installation files.
Common Upgrade Problems
Sometimes users cannot upgrade to Win 11 even when they expect their computer to be compatible.
TPM 2.0 Is Missing or Disabled
TPM 2.0 is a Windows 11 requirement. On some compatible computers, the hardware supports TPM but the feature is disabled in firmware.
If PC Health Check reports a TPM issue, consult your computer or motherboard manufacturer’s documentation before changing firmware settings.
Secure Boot Is Not Available
Windows 11 requires UEFI firmware with Secure Boot capability. Older systems configured for legacy boot modes may require a firmware configuration change.
Do not change firmware settings without understanding your current configuration, especially if the PC contains important data.
Processor Is Not Supported
A computer can have enough RAM and storage and still fail Windows 11 compatibility because its processor is not on Microsoft’s supported list.
In that situation, upgrading RAM alone may not solve the issue.
Windows 11 Is Not Offered in Windows Update
If your computer appears eligible but the upgrade is not shown, install all current Windows updates and restart the PC. Microsoft may also be temporarily holding the upgrade because of a known compatibility issue.
Installation Error Codes
Upgrade failures can be caused by insufficient storage, damaged system files, incompatible drivers, or interrupted installation processes.
Microsoft provides troubleshooting information for common Windows upgrade errors, including errors related to hardware requirements, drivers, and damaged system files.
Is Your PC Too Old?
If your computer does not meet Windows 11 requirements, do not assume that forcing an unsupported installation is the best answer.
Microsoft recommends installing Windows 11 on supported hardware and warns that devices that do not meet the minimum requirements may be left in an unsupported state.
For older computers, compare the cost of hardware upgrades with the cost of replacing the device. If the processor, firmware, TPM, and other components are significantly outdated, a newer Windows 11-compatible PC may provide better long-term value.
For users who need Windows software for a compatible computer, you can also explore the Microsoft software available from EshopBest.
Upgrade to Win 11: Final Checklist
Before you start the process, use this quick checklist:
- Check Windows 11 compatibility with PC Health Check
- Install all available Windows 10 updates
- Back up important files
- Confirm you have enough free storage
- Check application and driver compatibility
- Connect a laptop to power
- Use Windows Update when possible
- Avoid interrupting the installation
- Run Windows Update again after installation
- Confirm your Windows edition and activation status
Frequently Asked Questions
Can I Upgrade from Windows 10 to Windows 11?
Yes. An eligible Windows 10 device can be upgraded to Windows 11. The PC must meet Microsoft’s minimum hardware requirements.
Will I Lose My Files When Upgrading?
A standard in-place upgrade is designed to preserve personal files and applications, but you should always back up important data before installing a new operating system.
Why Does My PC Fail the Windows 11 Compatibility Check?
Common reasons include an unsupported processor, insufficient RAM or storage, missing TPM 2.0, or a system configuration that does not meet UEFI and Secure Boot requirements.
Is Windows Update the Best Upgrade Method?
For most compatible Windows 10 computers, Microsoft recommends waiting for Windows Update to offer Windows 11. Installation Assistant and installation media are alternative methods.
What If Windows 10 Is Still Working Perfectly?
A computer can continue to work after Windows 10 support ends, but staying on an unsupported operating system increases security and maintenance concerns. Moving to a supported Windows 11 configuration is the more future-focused option when your hardware is compatible.
Conclusion
For compatible computers, the decision to upgrade to Win 11 is easier when you prepare first. Check hardware compatibility, back up your files, update Windows 10, verify your important applications, and use Microsoft’s recommended installation methods.
Windows 11 is designed around modern security and hardware requirements, while Windows 10 no longer receives standard free security updates through Windows Update. If your computer passes the compatibility check, upgrading can give you a supported platform for future software, security updates, and everyday productivity.
The safest approach is simple: verify first, back up second, and install through a supported method. That makes the transition smoother and reduces the chance of avoidable installation problems.
Recommended External Resources
- Microsoft — Windows 11 Requirements
- Microsoft — Ways to Install Windows 11
- Microsoft — PC Health Check
- Microsoft — Windows Upgrade Troubleshooting